How To Start A Second Row In Crocheting
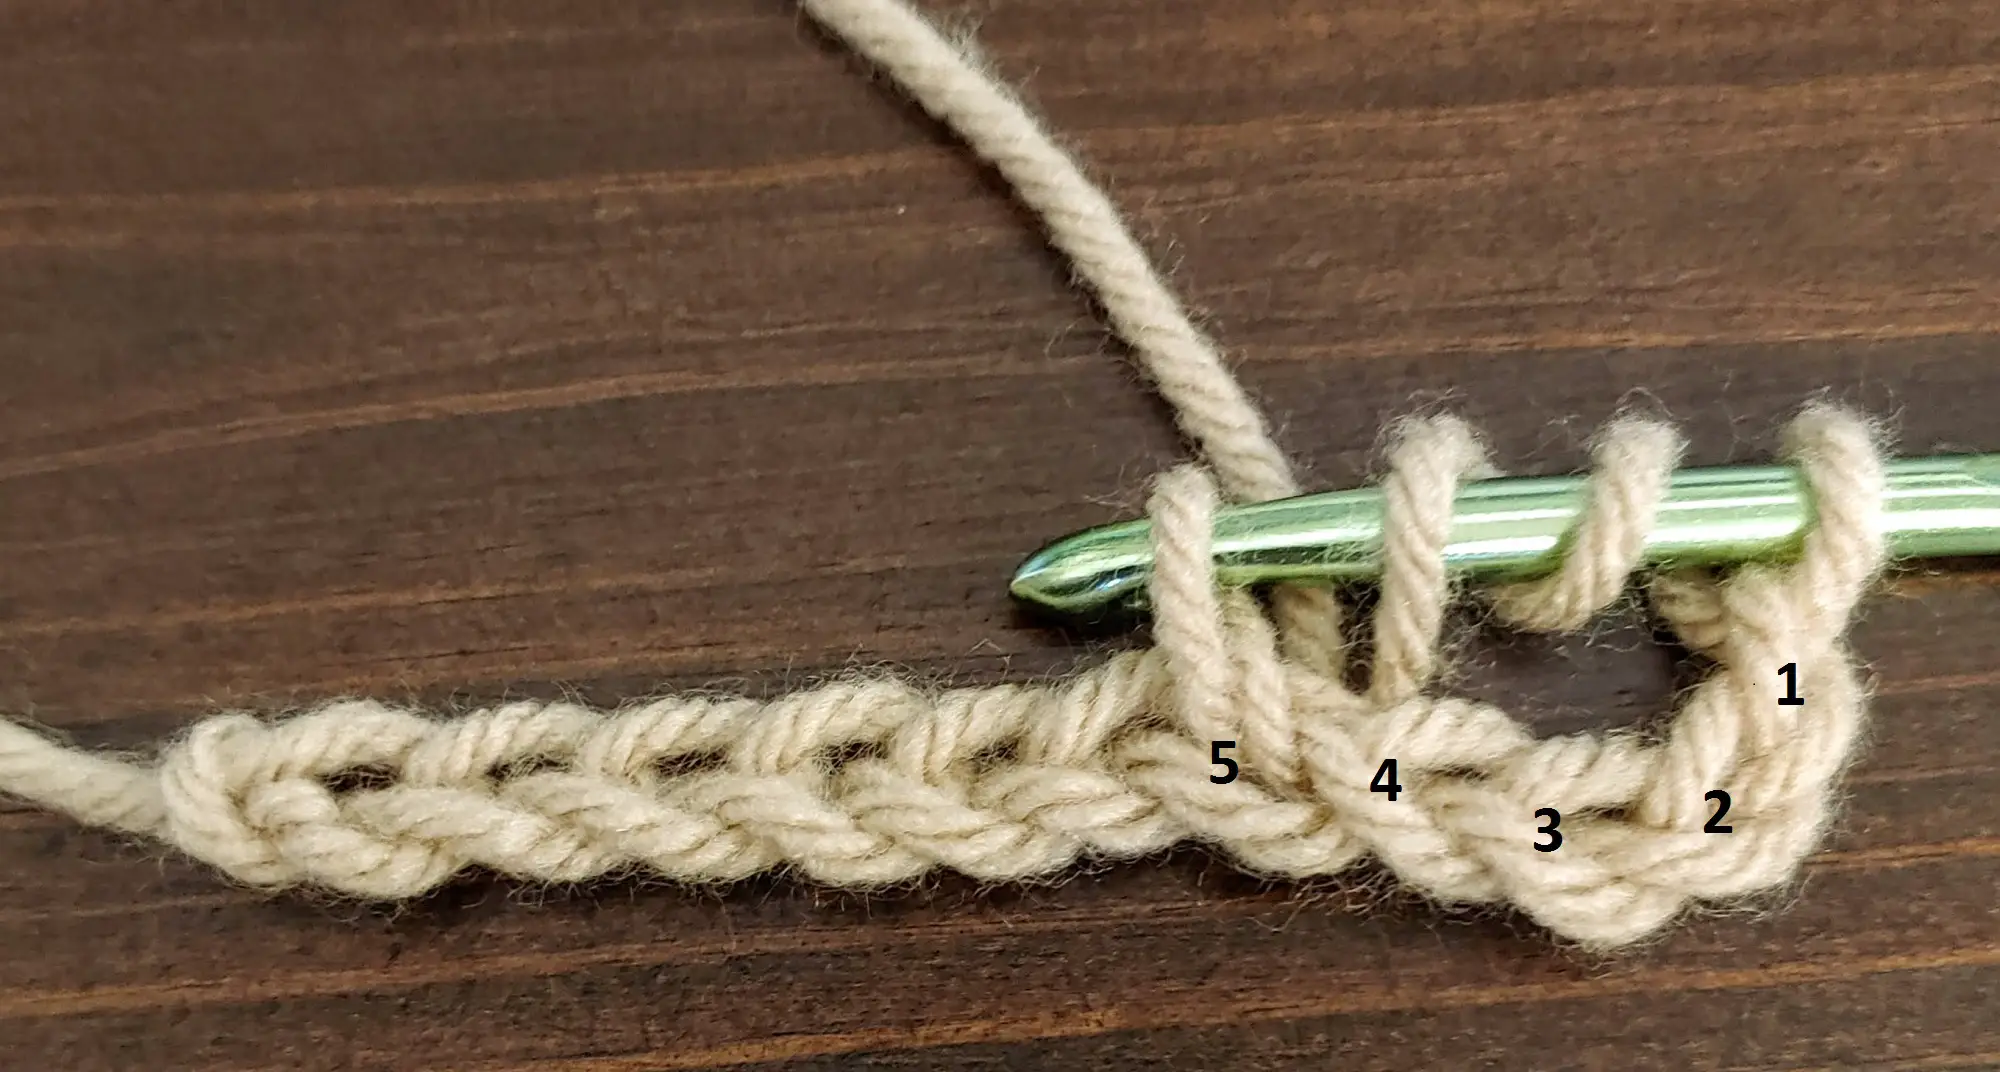
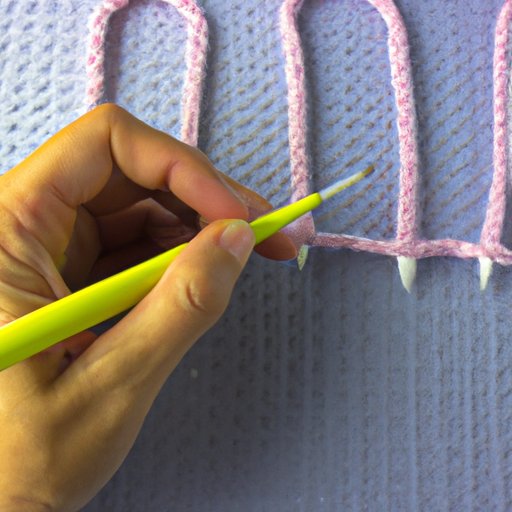
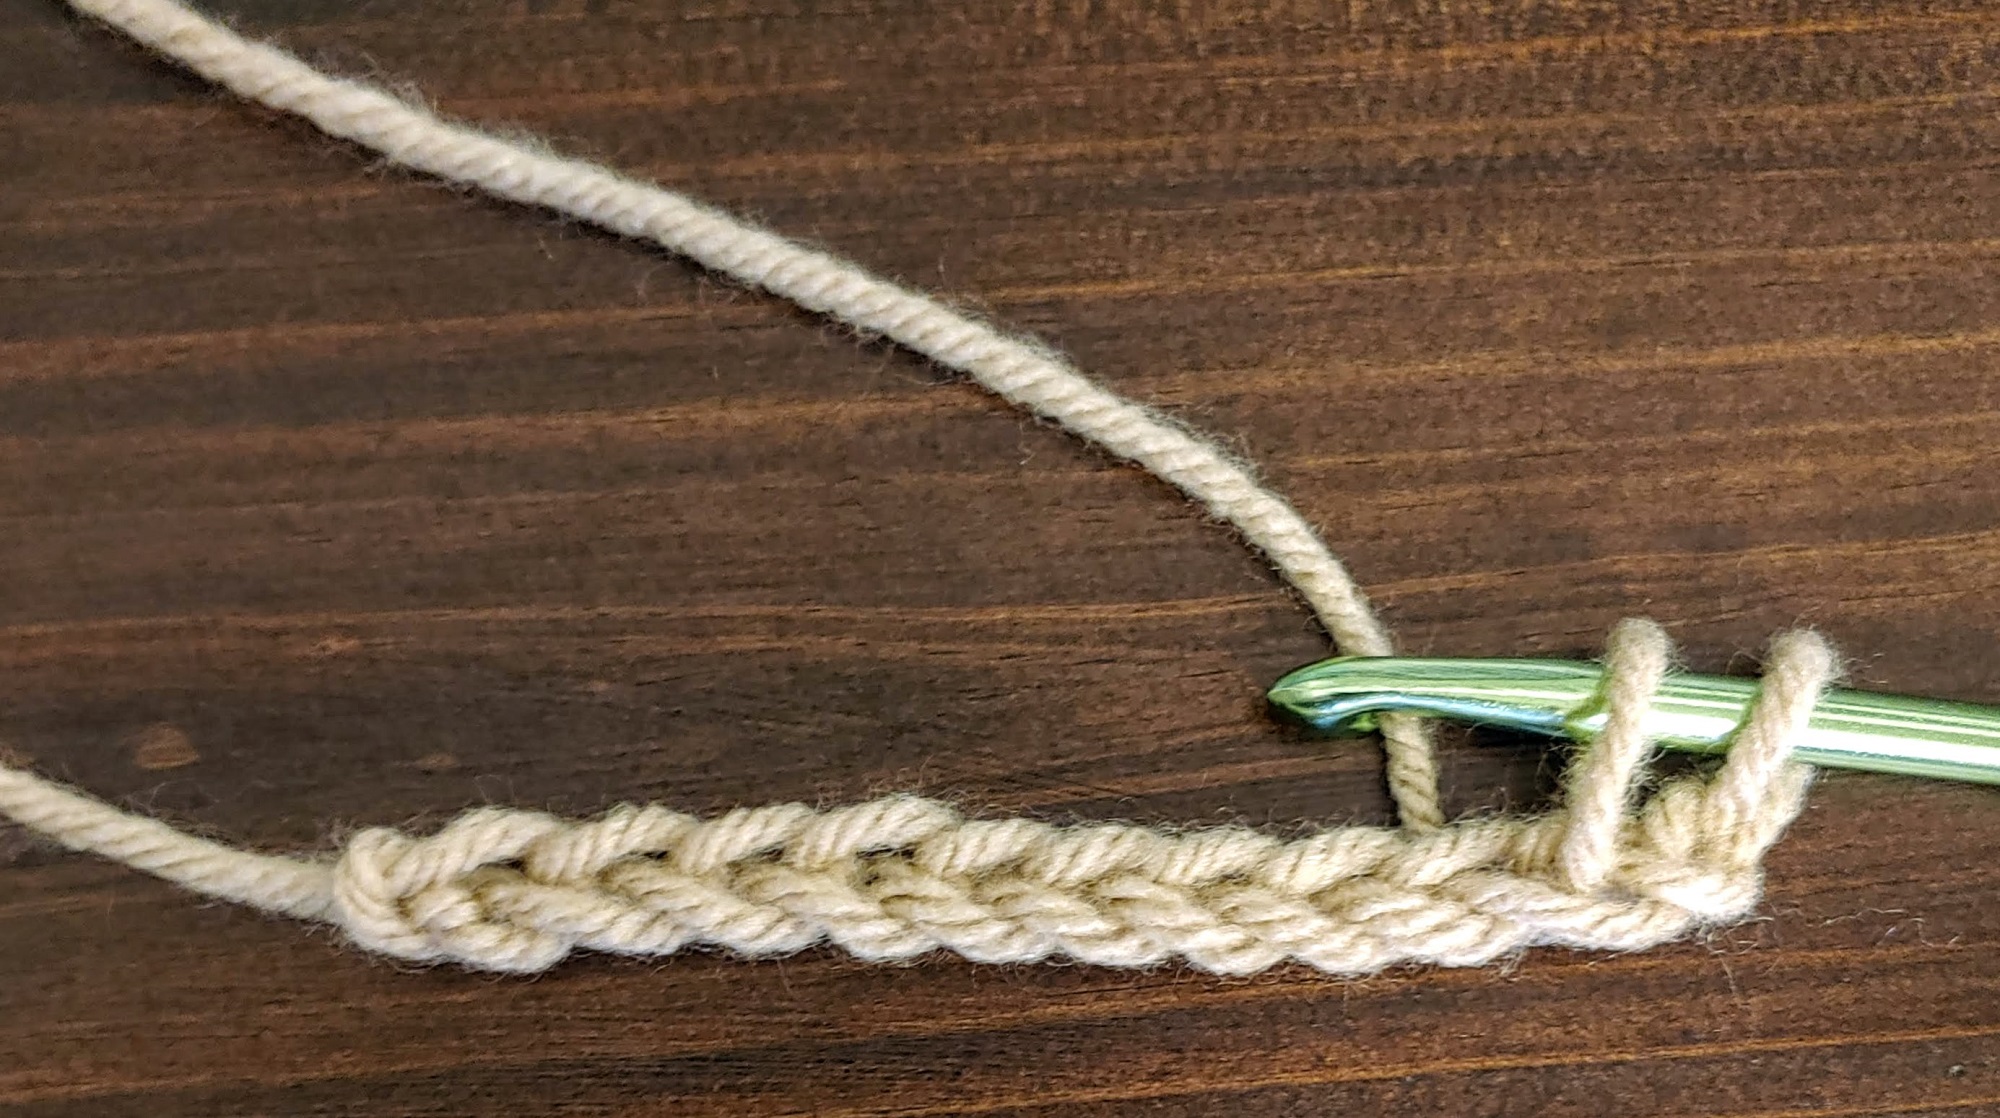
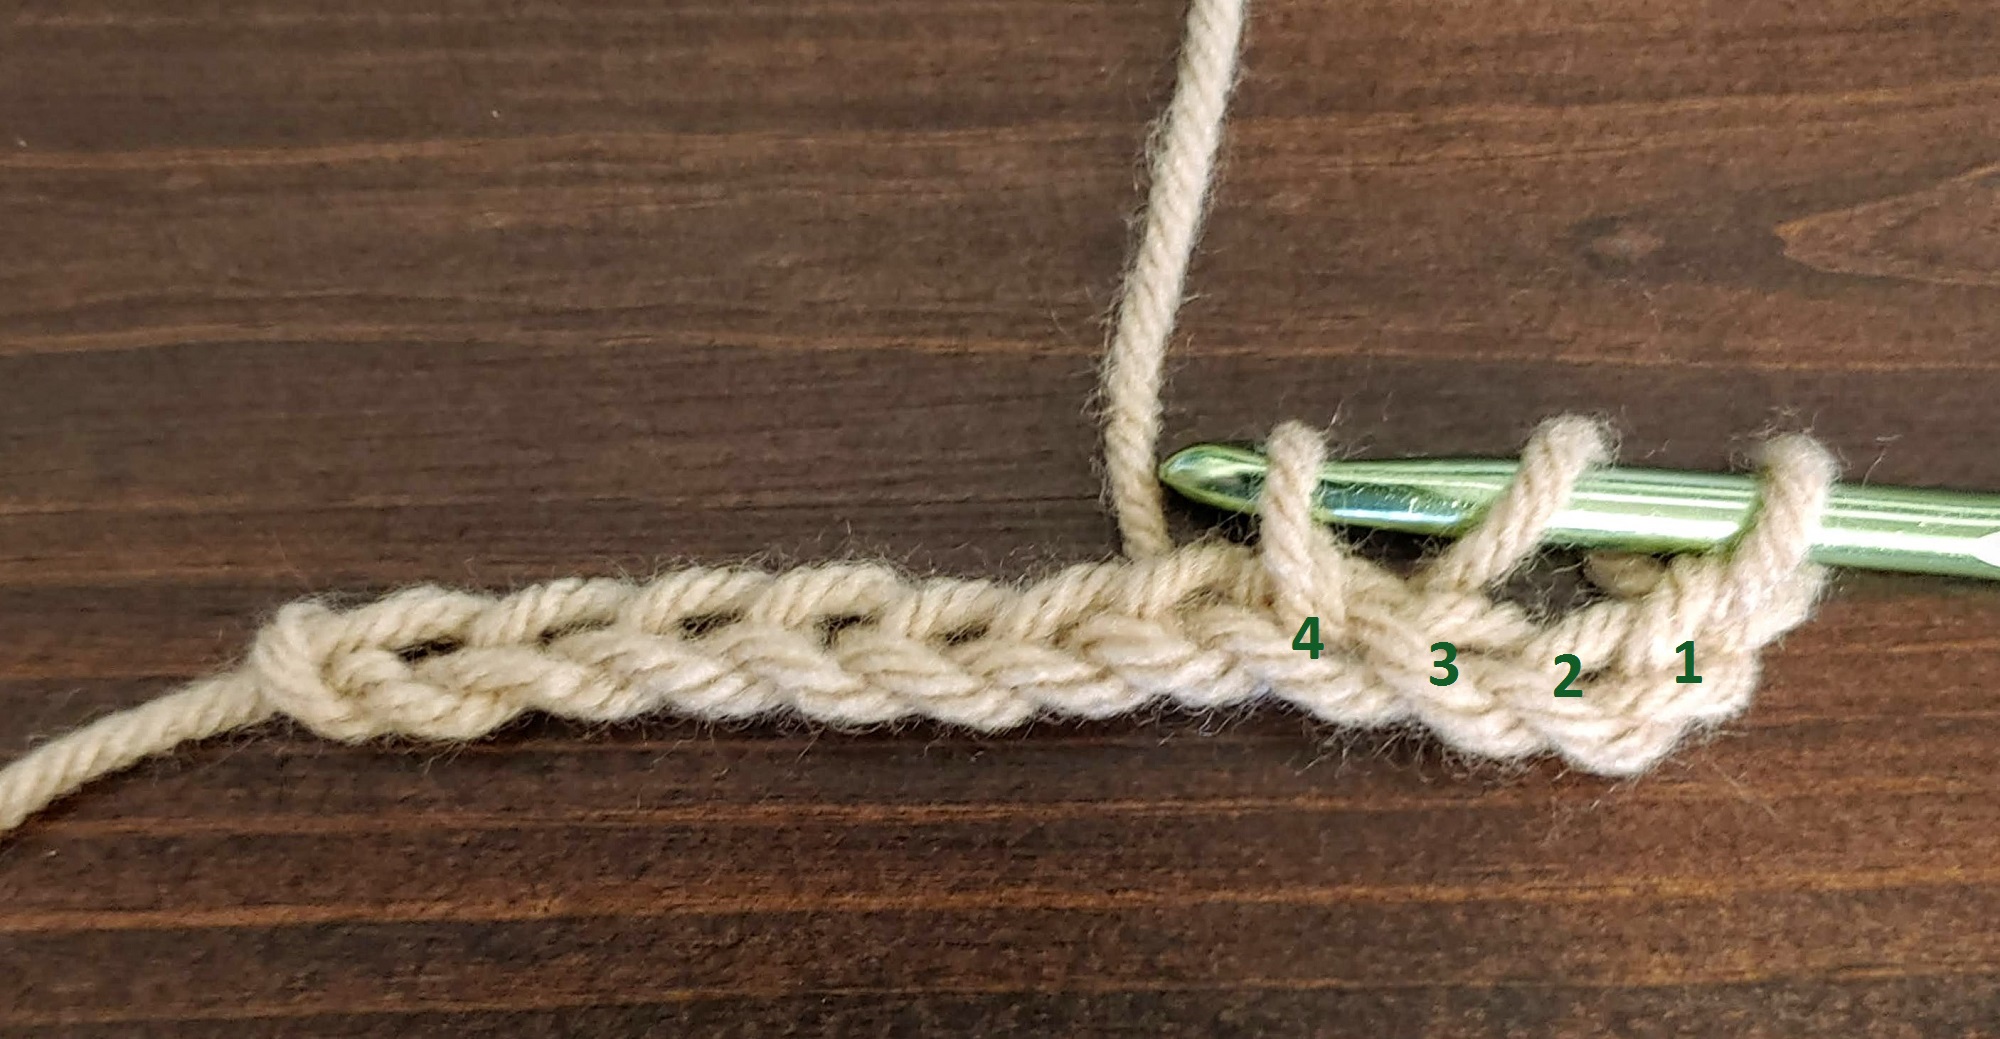
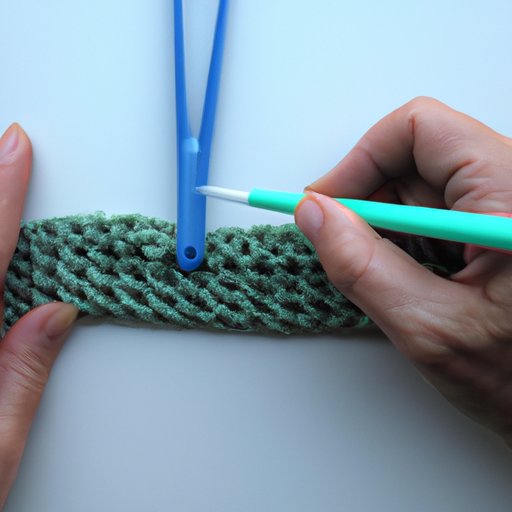
How To Start A Second Row In Crocheting - Now, turn your chain so your hook is at the far right of the row to allow you to work from right to left (if you are a lefty, it is opposite). In this blog post, we will walk you through the process of preparing. Then, add 2 additional chains. Make a single crochet swatch by following the steps in this lesson. How to single crochet on the second row. Web to make the next row after you crochet the second row, chain one and turn. Then keep going and make a single crochet in each. Once you have finished your first round of stitches, joined your two ends and made your starting chain, you will then skip the joining stitch and work your first stitch into the second to. Web where to work the first stitch. When starting your second row in crochet, remember to work into the top loops of the stitches from the previous row. Web where to insert your hook when you crochet the second row. Web crochet a swatch that’s at least 4×4 inches. 💚 😃 , let me know if you need me to do the next row. Web to start the second row of crochet, begin by chaining the number of stitches required for the pattern. Block your swatch before measuring. Then, add 2 additional chains. Web to start a second row in crochet, you just need to flip your work like the page of a book so that you can keep on crocheting into the previous row of stitches. Learn how to single crochet into a chain, and how to start a new row. First stitch of a new row: Once you have finished your first round of stitches, joined your two ends and made your starting chain, you will then skip the joining stitch and work your first stitch into the second to. Web you've just completed your first row of single crochet, and you are ready to move on to the second row. Insert your hook into the first stitch of the row and pull up a loop. Web how to crochet the second row when working in rows and in the round. Reaching the end of the row: Web starting a. To make the next single crochet row, chain 1, insert your hook into the second chain from the hook, and complete one single crochet. Web where to insert your hook when you crochet the second row. Adjust your hook size if needed based on your measurements. Web expert tips on how to make a second row in crochet: Web this. Web how to start the next row: Then keep going and make a single crochet in each. Insert the hook into the first stitch from the last row and make a single crochet. Lay the yarn over your left index finger. Then, make a single crochet in each chain all the way across. Web in this video, i'll show you how to crochet the row after a foundation chain. Web to make the next row after you crochet the second row, chain one and turn. Web this swatch shows each row starts with a chain 1 and a single crochet in the first stitch. Web how to crochet the second row when working. Web to start a second row in crochet, flip your work like the page of a book so that you can keep on crocheting into the previous row of stitches. Staring a new row of single crochets with a chain 1 that counts as the first stitch. Then, make a single crochet in each chain all the way across. Web. Make a single crochet swatch by following the steps in this lesson. Web how to make a crochet blanket for beginners.this is for you, bestfriend!!! Then, add 2 additional chains. Continue to the end of the row. Chain 1, insert your hook into the second chain from the hook, and complete one single crochet. This will allow you to work in the opposite direction and create a second row that is parallel to the first. Measure the number of stitches and rows carefully. Web to start a second row in crochet, you just need to flip your work like the page of a book so that you can keep on crocheting into the previous. 💚 😃 , let me know if you need me to do the next row. Once you have finished your first round of stitches, joined your two ends and made your starting chain, you will then skip the joining stitch and work your first stitch into the second to. Web to make the next row after you crochet the second. After completing your foundation row, you will need to turn your work so that you are working on the back side of your project. Once you've completed the foundation row, it's time to move on to the second row that establishes the pattern for the rest of the project. Then, turn your work so that the hook is facing the. Then, turn your work so that the hook is facing the opposite direction. This will allow you to work in the opposite direction and create a second row that is parallel to the first. 💚 😃 , let me know if you need me to do the next row. Once you have finished your first round of stitches, joined your. Now, turn your chain so your hook is at the far right of the row to allow you to work from right to left (if you are a lefty, it is opposite). Web to start a second row in crochet, you just need to flip your work like the page of a book so that you can keep on crocheting into the previous row of stitches. Web starting a second row in crocheting is a relatively simple process, but it is important to understand the steps involved in order to get the best results. Web to start the second row of crochet, begin by chaining the number of stitches required for the pattern. Crochet all stitches of this row through the back loops of the foundation chain: Insert your hook under both loops for a sturdy fabric, or just under the front or back loop for different textures. Whether you are a beginner or an experienced crocheter, understanding the steps involved in starting the second row will allow you to produce beautiful and polished creations. Web crochet a swatch that’s at least 4×4 inches. To make the next single crochet row, chain 1, insert your hook into the second chain from the hook, and complete one single crochet. Web where to work the first stitch. 💚 😃 , let me know if you need me to do the next row. Block your swatch before measuring. The row after a foundation chain is crocheted a bit differently than all the ot. Then, turn your work so that the hook is facing the opposite direction. Then, add 2 additional chains. In this blog post, we will walk you through the process of preparing.
How to Crochet the Second Row of Stitches Beginner Crochet

How to Move Up to your Second Row of Crochet YouTube

How to Crochet A Complete Guide for Beginners Sarah Maker
working the second row of single crochet YouTube
How to Start Second Row Crochet Master the Art with StepbyStep Guide
Starting the Second Row of Crochet Working Into the Foundation Chain
How to Start a Second Row in Crocheting A StepbyStep Guide The
Starting the Second Row of Crochet Working Into the Foundation Chain
Starting the Second Row of Crochet Working Into the Foundation Chain
How to Start a Second Row in Crocheting A StepbyStep Guide The
Once You've Completed The Foundation Row, It's Time To Move On To The Second Row That Establishes The Pattern For The Rest Of The Project.
This Will Allow You To Work In The Opposite Direction And Create A Second Row That Is Parallel To The First.
Adjust Your Hook Size If Needed Based On Your Measurements.
Lay The Yarn Over Your Left Index Finger.
Related Post: